You will need:
2 cut up chickens (It’s so good, you’ll want to make 2. Trust me on this one.)
2 seasoned cast-iron skillets (Don’t have them? Go get them. Don’t worry, I’ll wait.)
An oven (duh. Preferably a convection roast one, but any oven will do.)
Seasoning (I use Andy’s Rub, you do what pleases you.)
Oven mitts (cast iron gets HOT!)
a Cookiesheet
some paper towels
Hand soap (it’s CHICKEN silly)
 Here we go . . .
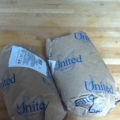
1. I get the butcher at my grocery store to cut up the chicken for me. Hopefully you have a friendly butcher who will do this for you. They don’t even charge. I ask them to roll up the back and the “gizzards” into a separate butcher paper, since I throw that into the freezer to make soup later. (I also throw ends of celery, wiggly carrots, ends of onions, etc. into the same bag with the chicken . . . when it gets big enough, I make soup. But that’s another post.) Have her cut the chicken into 8 pieces. What this means is that they cut the thigh from the leg. Otherwise, they will cut it in 6 pieces – which leaves the thigh and the leg together. I personally get the Organic, Free Range, They-All-Had-Names-And-Were-Massaged-Daily-Until-We-Snuck-Up-Behind-Them-While-They-Were-Doing-Meditation-And-Cut-Their-Heads-Off chickens, but you do what suits you. And while we’re talking about chicken, click HERE if you haven’t seen Julia Child’s episode about chicken. She does her chicken differently than I do, but it’s important to know the difference between a “fryer,” a “broiler,” a “roaster” and all the rest. Give this video a peek. It’s fun, anyway. Love Julia. (If you’re new to this blog, go Search on Julia Child to see some of my previous posts about my relationship to the great French Chef.)
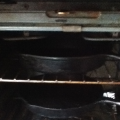 2. Come home from the Market. Put your two seasoned cast-iron skillets into a COLD oven. If you don’t know what seasoning is, click HERE. Cast iron needs to be seasoned. And it doesn’t matter if “they” say on the label that it’s “pre-seasoned.” When did you pay attention to what “they” say? (smile) No, seriously, season your skillet. And if you don’t HAVE a skillet, then start rummaging around thrift stores. You’ll find one. Go for the deeper one if you can – it gives you better “sides” for cooking. Even if you find one that’s rusty, you can usually scrub it up with steel wool and season it and it will be totally fine. BTW, in this link they say “never” to wash cast iron with water . . . I do, but I dry it thoroughly after. And ONLY if it really needs it. (Best to wipe it out and leave the oil, etc. “in there” to continue seasoning the pan.)OH, and be SURE that you have the BOTTOM OF THE OVEN lined with aluminum foil. The way that you will make this chicken (particularly the wings) will make fat “drip”
 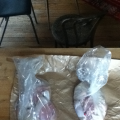 down off the pans and onto the bottom of the oven. It’s a MESS but super duper easy to clean up IF you take the SECOND to line the bottom of the oven (under the heating element) with foil. ‘Nuff said. If you make a mess, don’t blame me. ;-)
3. Heat the oven to 425 degrees. If you have a “convection roast” setting, use that. If you don’t, bake is fine, but the cook times might not quite work as they do here – it’s really best to try to use a “roast” setting. But if you have a super old-fashioned oven where your choices are basically Bake (on the dial) or “High” for the top coil, go for Bake. It’s safer. Remember RECIPES ARE FOR TWEAKING! :-) Oh and before you ask, YES, you are heating the cold oven up to 425 degrees with your skillets in there.
 4. Open up the butcher paper wrapping, using it to shield your countertop. It’s CHICKEN, remember? Chicken contains all sorts of ugga-bugga germs. Even the aforementioned Massaged-Meditated-Named chicken. Keep your countertop shielded.
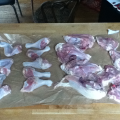
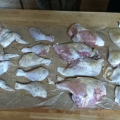
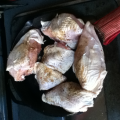
5. Arrange the chicken on the paper. Wings with wings, and so on. You want the wings and legs together, the breasts and thighs together. (The back and insides are in the freezer, remember?) Arrange them “skin side down” and pat them dry with a paper towel. YOU HAVE TOUCHED CHICKEN – GO WASH YOUR HANDS!
 6. Wash Your Hands! This needs its own number. When you touch the chicken, you aren’t getting down and rolling your bad self all over it. Parts of your hands will touch the chicken, parts will not. TURN THE WATER ON IN YOUR SINK WITH A PART THAT DOES NOT TOUCH CHICKEN (like, the side of your palm where your thumb attaches to your wrist). This is one of the biggest issues in kitchen cross-contamination – you are careful about “washing your hands” but you turn the water on with the part of your hand that touched chicken, and then you don’t wash the handle. REMEMBER which parts of your body touch the chicken, and which do not. Use accordingly.
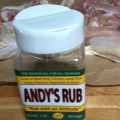 7. Season the Chicken. I use Andy’s Rub. I love it. Use whatever you like – I think the first time it’s best to use a “seasoning” mix that you’re familiar with (Trader Joe’s 21 Seasoning Salute is another suggestion), then you can branch out and make Cajun chicken, etc.
 8. Flip The Chicken Skin Side Up. Flip the chicken on the butcher paper so that the skin side is now up.
9. WASH YOUR HANDS! (Did you go to grab the seasoning bottle with your ugga-bugga microbe’d fingers? NOW you have to wash the BOTTLE AND your hands…)
10. Season the Skin Side. Your oven should be pretty close to 425 degrees by this time.
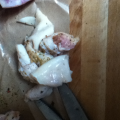 11. Cut off any extra skin that isn’t attached to the Meat. When the butcher cut the chicken into pieces, she will have whacked on through the thigh, breast, etc. connections. On the “edges” of these pieces in particular, there will be skin that’s not really “attached” to the meat – it’s “loose.” Get some scissors and cut all this “loose skin” off. NOT the skin that IS attached to meat – just this “loose” skin.
12. Wash Your Hands. Wash Your Scissors. Did you think I wasn’t watching you??? In case you care, I use an organic soap that kills all the bugs and then some, by Young Living based on their “Thieves” brand. If you’re taking photos, don’t touch the cell phone ANYWHERE that you have put your ugga-bugga fingers. And yes, I know these photos are crappy resolution. Sorry, my bad :-(
 13. Put The Chicken In The Pan. This is important . . . pull out the top pan. It’s HOT! (Note in the picture I have these little “mitts” that fit on the end of the cast-iron skillet? They’re awesome.) BE CAREFUL! Put the breasts into the pan “thick side up” and as many thighs as fit into the bottom of the pan (usually two). Look at the picture, you’ll see what I’m talking about. Put this pan back in the oven, with the pan part as far back and left as it can go (so the handle will be pointing towards the front right corner of the oven). Take the 2nd pan out (BE CAREFUL) and – this is IMPORTANT – drape the wings over the cast iron like you see in the picture. Then take the legs, and arrange them like the picture, PRESSING them into the cast iron “side” of the pan. Last, put the thighs that are left in the bottom of the pan. And…what’s wrong with the picture? Yes,
 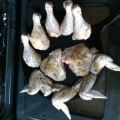 there are 5 legs. I started laughing so hard as I was taking this photo I nearly let the oven temperature drop! I don’t even WANT to know what the poor soul who took his chicken home after getting it butchered thought, opening up the wrapper to find just one leg . . . Put this pan on the lower rack, with the pan as far to the RIGHT FRONT as it will go (so the handle will be pointing toward the “back left” of the oven). Why? Because you are trying to have as little “overlap” between the bottom and top pans as possible. If you don’t get what I’m talking about, it’s not that big of a deal, but hopefully you understand where I’m going with this. When you take the bottom pan out you’ll need to roll out the rack so you can grab the handle – which WILL BE HOT . . . OH, and the reason you are pressing the legs (and wings) into the “side” of the pan is that these pieces have skin on two sides. You want both sides to get crispy, and the only way is to have them up against the side of the pan. It will “sear” them when you put them there. The fat and “chicken juice” will leak out of
 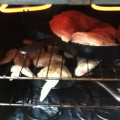 the pieces as they cook, and if you have the legs or wings anywhere else in the pan, they don’t crisp up, they just lie in the juice at the bottom of then pan. But the thighs only have one “skin side” so it’s fine that they don’t “crisp” on the side down in the pan – because it’s just meat, not skin.
14. Cook The Chicken for 15 Minutes. Set the timer for 15 minutes, and go do something nice for a while. Be sure you have  your fan on, the chicken will smoke if the fat drips off the pan and onto the FOIL-LINED bottom of the oven.
15. Ping! 15 minutes is up – Switch The Pan Positions Around. This is the only “tricky” part of the whole enterprise. Now, if you are only cooking ONE chicken or only have ONE pan, you can figure out how to do it – just be sure that you know how to position the chicken in the pan, and you can cook it the entire 30 minutes in the middle rack of the oven and be done with it. And when your husband devours the entire chicken before dinner (as I write, we are now down to 2 legs (of FIVE) and 3 thighs, I 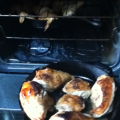 see . . . “someone” has been sneaking in behind my back), you’ll wish you had made two, BUT I DIGRESS (how unusual). Anyway, so CAREFULLY take down the top pan, and swap it for the bottom pan. Particularly if you’re using Convention Roast, you will for sure see that whatever part of the bottom pan was “under” the top pan while it cooked will have no color on the chicken. It’s not as integral the second time around where you position the pans, but I try to put whatever part of the breasts/thighs that are lightest in the “open” area under the top pan.
 16. Cook The Chicken For 15 Minutes. Nurse any burns you have. I told you to be careful . . .
17. Line The Cookie Sheet with Paper Towels. You’ll want to have at least 2 layers of paper towels on the sheet.
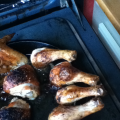
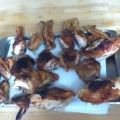 18. When the buzzer goes off, take the wings/legs out first. Arrange them on the cookie sheet with the wing tips “draping over” the side of the sheet – then the legs with the bone up. See the picture. Basically you’re not only trying to leave enough room, but you’re also trying to have the “fattest side” down on the towel. Now do the same with the breasts/thighs.
19. “Schmaltz” and Chicken Juice. The pan that had the wings and the legs in it will have very little “chicken juice” and a lot of “schmaltz.” That is a Yiddish word for basically rendered chicken fat. It’s the most delicious part of the whole process. I, in fact, make this twice a week not only because it’s the most juicy, crispy, delicious chicken you will ever have, but I get to eat all the 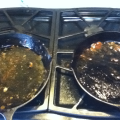 schmaltz. Are you wrinkling up your nose? GREAT! I will be RIGHT OVER to eat yours, too. Anyway – skim off the schmaltz from the juice, and pour the juice from the wings/leg pan into the other pan. It will have a little schmaltz, but not much. What now? Cook greens in it! Beyond delish – pile a TON of greens (kale, collards, etc.) – HEAP them into the pan with the chicken juice in it, and turn them with tongs over and over as you heat them. Once they are covered with the chicken juice, put a top on the pan, turn it on low, and steam until they are done. I happen to have a see-through glass top that I use ,so I can really TELL when they have wilted. But you can use just about anything – if your cast iron pan didn’t come with a cover, use a plate. (BE CAREFUL IT WILL GET HOT!)
20. Send Me A Thank You. The only thing that might “go wrong” here is if you use an ENORMOUS chicken (almost impossible if you’re eating organic) and the meat near the bone in a big piece (like the breast) isn’t cooked all the way. If that happens, and you’re NOT using monster non-organic chickenzillas, that likely means that your oven and this recipe don’t get along. What you need to do is LEAVE THE CHICKEN IN THE OVEN after you turn it off (after the 30 minutes cooking time) and let it cook in there WITH THE OVEN OFF. I have only had this happen at one friend’s house, and we found that leaving it in for 15 minutes (again, oven OFF and closed) did the trick. The idea here of course is that the cast iron holds the heat, and just radiates it back out enough to cook the chicken through. But honestly, if you’re using “regular sized” (organic) chickens, this recipe should work for you unless your oven is odd.
Ta- da!!!